OTC Clear Procedures Support
Overview of content
Trade Transfer
As derivable from its name one or more trades can be transferred. The transfer is always a transfer to a different Clearing Member ID. A trade transfer always terminates the existing trade and re-opens a new trade with the same attributes and a new trade id.
A trade transfer can be performed via the Eurex OTC Clear GUI (Production/Simulation). It is the same process for both environments.
FAQ
A Clearing Member or Disclosed Client with system access to the EurexOTC Clear GUI.
For each transfer, a member needs two users with respective access rights for the OTC Clear GUI to initiate and confirm the action.
Clearing Member or Disclosed Clients with system access can trigger the transfer.
Who needs to approve it?
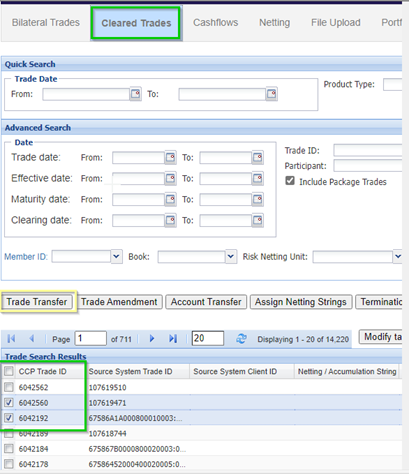
- In the Cleared Trade tab, trades that should be transferred can be selected by ticking the box next to the CCPTradeID. After selecting the trades, the button “Trade Transfer” needs to be pressed.
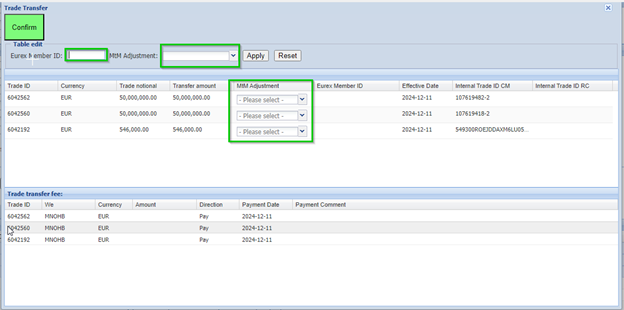
- In the Trade Transfer window which opens automatically, the target member as well as MtM Adjustment option (yes or no) can be selected. By clicking on Confirm, the transfer process will start.
- In any case both old and new Clearing Member need to accept the transfer
- By 4EP there is always a 2nd approval necessary (i.e., in general always remember: two users from one Clearing Member)
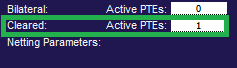
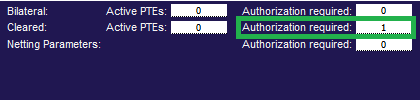
The second approver (old Clearing Member) can find the trade(s) to be approved for transfer under the authorization required window (Eurex OTC Clear GUI):

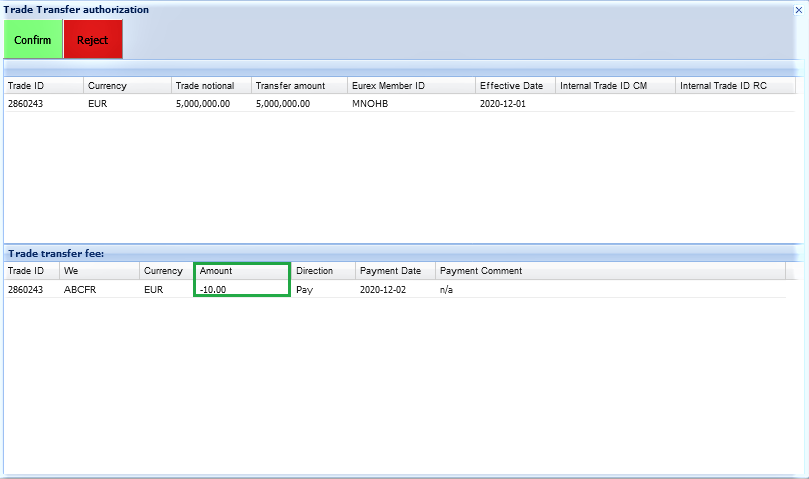
After clicking on the number, the second approver can see the following (EUREX OTC Clear GUI after clicking on the number behind "Authorization required"):

- The second approver cannot make any changes, just accept or reject.
The new Clearing Member will then find the trades for take-up in as follows in the OTC Clear GUI:
At this point the account can be changed on which the trade should be booked (and - if necessary – adjust the respective Source System Client ID, if you get an error message).

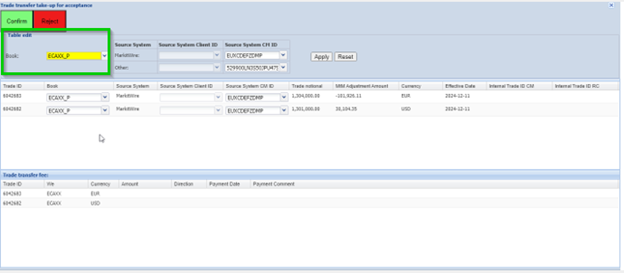
The second approver (new Clearing Member) can find the trade(s) to be approved for transfer under the authorization required window:

In the Eurex OTC Clear GUI after clicking on the number behind "Authorization required"
- The second approver cannot make any changes, just accept or reject.
- If there is enough collateral to fulfill the margin requirements for both parties, then the trade in transferor account will be in TERMINATED status and trade in transferee's account will be in VERIFIED status!
At any time during the business hours:
- Simulation and Production: 8am – 10pm CET
- Please note, in Simulation, there will be no trade novation after 6 pm CET. This means, after 6pm CET trade transfers can be initiated but will be queued until the system opens on the next business day at 8am CET.
- A trade can be transferred from one Clearing Member ID to another one.
- This also includes client trades moved from one Clearing Member to another one.
Configurable box allows to select up to 100 trades at once when initiating a transfer in the GUI. If you wish to transfer more than 100 trades, then you will have to perform the procedure several times.
There is also an option of a portfolio transfer to trigger a transfer with no limitation on the number of trades in the respective portfolio - but this is a different process.
Portfolio Transfer can also be done via EUREX OTC Clear GUI and more information on this can be found here (Please click here for the chapter Portfolio Transfer).
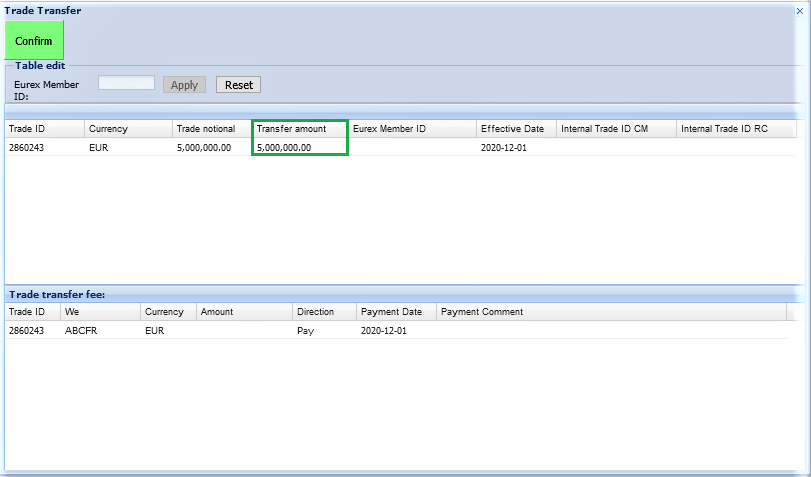
- Yes, when triggering the transfer the nominal of the trade to be transferred has to be set in any case.
- The cell of the transfer amount is prefilled with the nominal of the original trade.
- If decided to transfer a trade with smaller nominal than the original trade a trade with the remaining nominal will prevail.
Trade Transfer Window in the EUREX OTC Clear GUI:
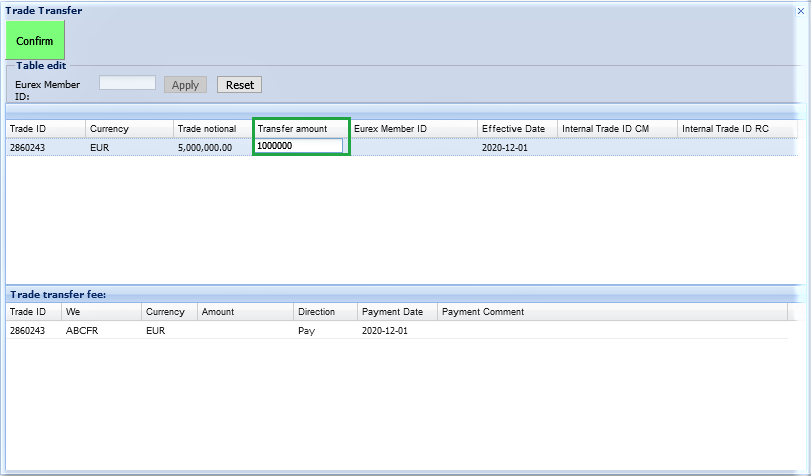
- In any case the old trade will be terminated, i.e. the old trade id is not valid anymore.
- In case of a partial trade transfer a new trade with a new trade id and the remaining notional will be created.
Yes, directly when triggering the transfer.
The direction of the fee (pay / receive) can be selected and the payment date specified.
Additionally, a comment can be entered (e.g. to explain purpose of the fee).
EUREX OTC Clear GUI Trade Transfer Window:
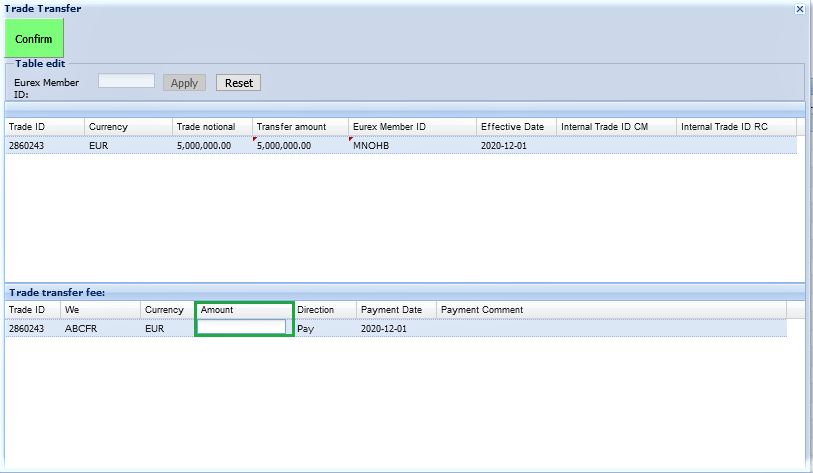
The direction of the payment always refers to the member listed under “We”.
The direction is also visible for the second user who needs to approve the transfer from the sending party by the sign of the amount (EUREX OTC Clear GUI).
- In general, the fee date depends on the currency. For all T+1 currencies (EUR, CHF, USD, GBP, PLN), the fee date has to be T+1, with T being the transfer date.
- For T+2 currencies (JPY, DKK, NOK, SEK, CZK, HUF), the fee date has to be T+2, with T being the transfer date.
- If the current date or a past date is entered, then the following error message appears in the EUREX OTC GUI:

- The new trade id will be displayed when the transfer needs to be accepted by the second user (as in the screenshot under 4.) in the Trade Transfer (Take-Up) window.
- If the transferor informed the transferee on bilateral basis about the CCP trade ID of a trade, the transferee can find a trade based on PrePTE ID equal to the CCP trade ID in the Advanced Search section of the cleared trade window.
Yes, there are restrictions e.g. for the fee payment date . Further information and a step-by-step manual is available (EUREX OTCCLEAR User Guide).
In case the trade is in status WAIT_MARGIN there is not enough collateral on either the old or new account or both.
- When the new Clearing Member tries to pick up the trades.
- If an initiated PTE does not pass the incremental risk check successfully it can stay pending in status ‘WAIT_MARGIN’ until the end of the business day and will be rejected afterwards.
- Depending on portfolio/position changes additional collateral is necessary for the transfer to be able to be processed.
- These can affect the old Clearing Member as well as the new Clearing Member.
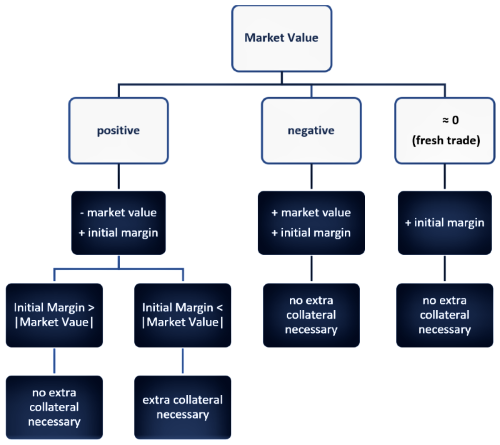
* Under the assumption that the transferred trade has a risk increasing effect on old and new portfolio, the Initial margin in below chart represents the Initial margin amount which will be released after the transfer for the transferor account and increase in initial margin amount for transferee account.
Possible effects for the old Clearing Member:
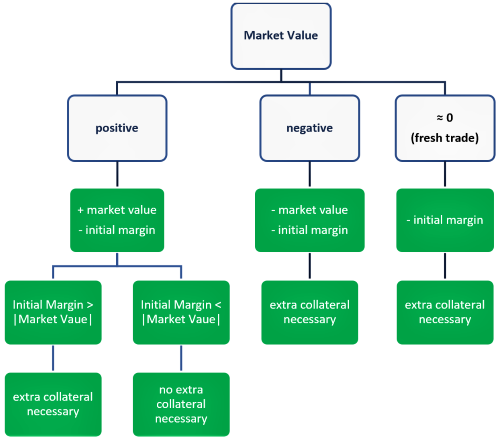
Possible effects for the new Clearing Member:
The relevant status are:
TO_BE_TERMINATED
VERIFIED
WAIT_MARGIN
WAIT_TAKE-UP
More information on the status and the meaning can be found in chapter 11.2 “Portfolio and portfolio event status changes” in the EUREX OTCCLEAR GUI User Guide available via the Member Section.
The trade daily summary report (CI201 / CB201) shows all terminations and novations due to post trade events like the trade transfer.
You can find it on the Member Section or via Help in the OTC Clear GUI:
Member Section:
- Login to the Member Section of Eurex Clearing
- Go to Resources > EurexOTC Clear > System Documentation > GUIs
Help Functionality in the OTC Clear GUI:
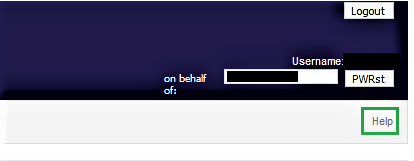
This will directly provide the manual to be opened or saved
Contacts
EurexOTC Helpdesk
Eurex Frankfurt AG
Key Account Management
Service times from 09:00 - 18:00 CET
Eurex Clearing AG | worldwide
Helpdesk Clearing Data Control
Service times Monday to Friday from 08:00 – 20:00 CET
(no service on Saturday and Sunday)
T +49-69-211-1 24 53
Eurex Frankfurt AG
Customer Technical Support / Technical Helpdesk
Service times Monday to Friday from 01:00 – 23:00 CET
(no service on Saturday and Sunday)
T +49-69-211-VIP / +49-69-211-1 08 88 (all)